Not-So-Lucky Stars- Tutorial and Blog Woes
Last Tuesday I wrote a nice long post about Origami Lucky Stars, and saved it to my drafts to await pictures. With a hectic week of holiday hijinks, the photos apparently weren't in the cards. Knowing that I wanted to get the tutorial .pdf up anyway, I logged in tonight, baby sleeping draped across my lap because she (as usual) will not sleep on her own- though the baby is technically unrelated to my frustration. I attempted to round out the post with a couple of pictures I had on hand and some witty words.Then it disappeared (I don't even know what button I hit!), and I was left with only half of my first paragraph, in a five-paragraph three-photo two-link post. The draft decided to autosave just after my mishap. Isn't technology great?So forgive the truncated presentation, but I still want to share these darling Lucky Stars.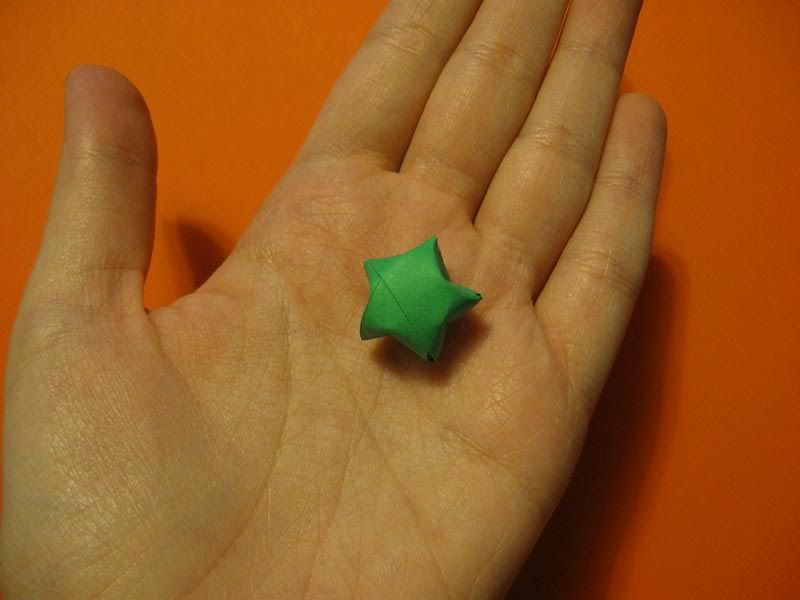 I make them often, just to relax. They go everywhere and do everything. Fill jars with them, string garlands of them, make jewelry with them, they're always pretty and always a conversation starter. But they're so much easier than they look!This year I'm making lucky star "starter kits" for some of the teenage girls on my gift list. The kit consists of approximately 200 paper strips (1/2 inch wide, 11 inches long), a photo tutorial, and a pair of lucky star earrings to show off the finished product. House them all in a jar, tie a little ribbon, and you're done! Cutting the paper strips is the time consuming part, but another option is to print templates and let the gift recipient do the cutting. This is my favorite blank template, but that deviantArt user (and many others!) also offers cute designs you can print at home!What are you waiting for? Download the tutoral now!


It looks so cute! And it's green my fave color! Can you fit something really tiny inside of them? Thanks for sharing.
ReplyDeleteThey're not really hollow, they have quite a few layers of paper inside, so I don't think you can hide things in them. But they fit inside other things really well.
ReplyDeleteThanks for the blog visit and kind comment. These are adorable stars! Such a bummer when a post gets lost. I feel your pain :)
ReplyDeleteSo cute! I remember buying a kit to make these in high school and I bet I still have it somewhere!
ReplyDeleteI remember my best friend Jessica making me a box filled with these little stars when I moved away. Ah, memories :)
ReplyDeleteTHANK YOU!!! I've been wanting to make these forever and was going to spend some time googling and found you right on the Sundae Scoop on I heart naptime and I am sooooo grateful. I'm going to make a jar of these out of sheet music and give it to a friend of mine to place on her piano. It is SO the perfect gift for her! Thank you again!
ReplyDeleteAuntiejenni, I'm so glad you can use it! Your friend will love such a personal gift, it will be beautiful I'm sure. I gave the first of my kits out today and she was thrilled. Handmade gifts are so rewarding.
ReplyDelete