
Size 3.75 crochet hook
1. Start with your cap color. Do you know how to do a "magic circle"? If not, see the link at the end of the post! Cast on six single crochet stitches. Pull your circle tight. (6 st)
2. Single crochet twice in each stitch. (12 st)
3. Single crochet, single crochet twice in next stitch; repeat five more times. (18 st)
4. Single crochet two times, then single crochet twice in next stitch; repeat five more times. (24 st)
5. Single crochet three times, then single crochet twice in next stitch; repeat five more times. (30 st)
6. Single crochet around for five rows.
7. Single crochet three times, skip one stitch, single crochet; repeat five more times. (24 st)
8. Single crochet, skip one stitch, single crochet; repeat seven more times. (16 st)
9. Your cap is done! Finish off, but leave a nice long tail, we'll use it to stitch the cap and stem together.
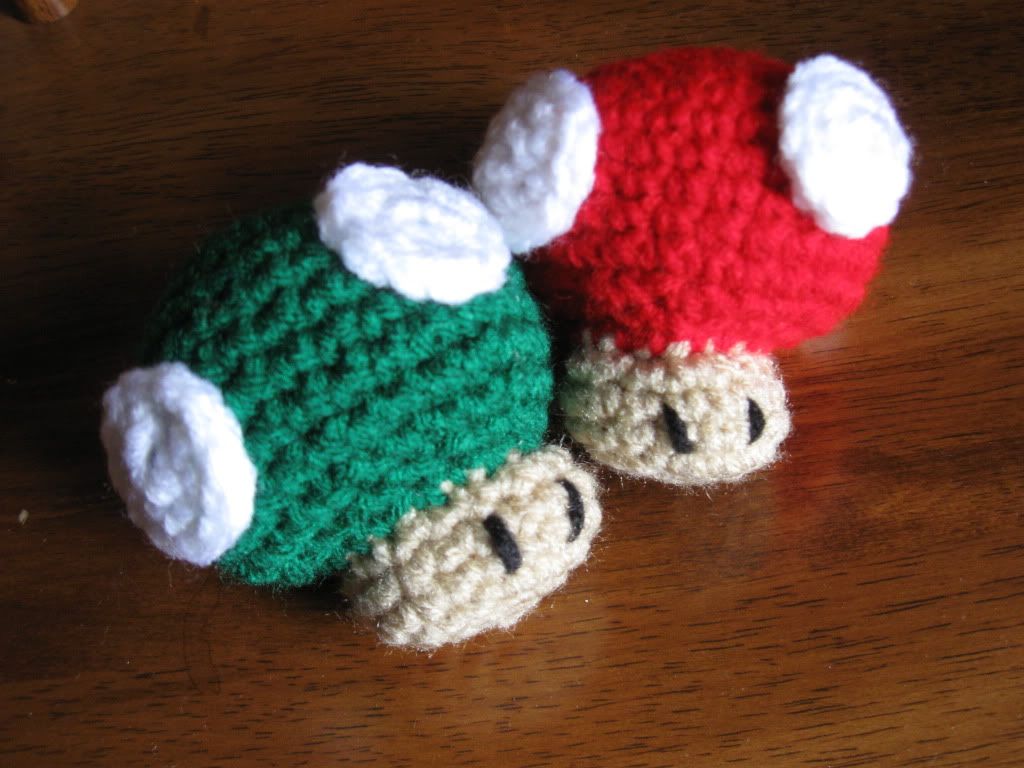
10. Now is a good time to embellish your cap. For toddler-safe Mario mushrooms I crocheted four white circles and attatched them evenly around the cap, but I am dreaming of making a grownup version with buttons sewn on everywhere! Your imagination is your only limit!
11. Time for your stem color. Using your magic circle again, cast on six single crochet stitches. Pull your circle tight. (6 st)
12. Single crochet twice in each stitch. (12 st)
13. Single crochet, single crochet twice in next stitch; repeat five times. (18 st)
14. Single crochet around until your stem is as long as you like (I did three). Finish off. If you're making Mario mushrooms, remember to add the little eyes!
15. Using the tail you left on your cap, stitch the stem halfway onto the cap. Stuff, then close your gap and hide the yarn end. You have a mushroom! Enjoy!


These are so cute! Then again, I am partial to fellow spouses of nerds ;)
ReplyDeleteWhat a cute idea! I am your newest follower! You can follow me at http://craftycierra.blogspot.com/ Dont forget to enter my giveaway! If you are interested in doing a blogswap, please email me at CierraLarsen at hotmail dot com
ReplyDelete/Cierra
Hmmm...it's been a while since any posting was done...I hope you're not burnt out on blogging already! Really, it's FUN and addictive once you get into it :)
ReplyDeleteNot burnt out, just busy with the holiday. I'm still figuring ot where blogging fits into my schedule best. :)
ReplyDeleteSaw your post at the LambAround linky and had to come by! My daughter is a huge fan of amigurumi and Mario Bros. Your mushrooms are so perfectly done!
ReplyDelete